For teachers
![]()
But what is Embroidery Designer anyway?
With the embroidery extension of Pocket Code or Create@School (only available for Android) own embroidery patterns can be programmed. There are no limits to your imagination!

More photos and videos can be found on the Instagram page of Code’n’Stitch.
Getting Started
Drawing of geometric patterns, simple line drawings, creative phase:
- Required skills: none
- Environment conditions:
- maybe Smartphone or PC for research
- paper, pencils, ruler, compasses
- Plaid paper or printout of the template
Design Process
01.Idea
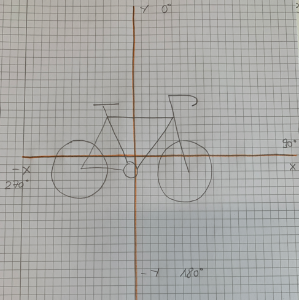
I want to embroider a bicycle.
Research on the Internet.

02. Draw design
The desired design is best drawn by hand on a plaid piece of paper. The students should consider which geometric shapes will be used.

03. Geometric shapes of the bicycle
Bicycle example: Two circles are drawn, which are connected by straight lines. The angle between the lines should also be calculated.
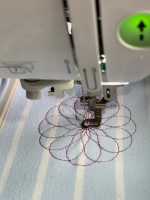
04. Des embroidered bicycle designs
After programming the embroidered design could look like this:

What are programmable designs?
Here it is a matter of abstraction and reduction, i.e. to create patterns that are as schematic as possible.
- What goes well: straight lines, circles, semicircles, quarter circles
- What does not go well: curved lines, ovals, filled areas, too many individual objects
Specification:
- Maximum 15-20 single "strokes".
- For example 9 lines and 2 circles
- Use only lines, circles, half or quarter circles
- Your design should be simple and contain few details.
- If there is still time, you can always program something in addition.
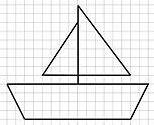
Realistic designs:
Only lines, circles, not too complex


Unrealistic designs:
Indeed very beautiful, but difficult to implement.
Too complex, too many details, too many curves


Then how is programming done?
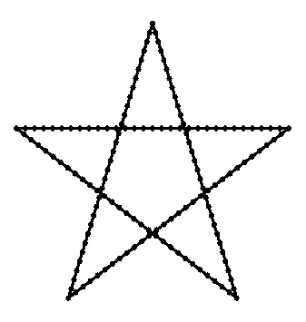
Example relative rotation:
line 5 cm, turn left 45°, line 2 cm, turn right 90°, line 2 cm, turn left 45°, line 5 cm


The following program generates a star:

Here is a video tutorial for beginners with the absolute rotation:
More videos are available on our Video-Tutorial-Seite.
Helpful documents & downloads for printing
- A lot of Tutorial Cards to print out with instructions for basic features of embroidery programming, as well as ready-made patterns, can be found in this .

- Information and first steps in course card format for distribution to the children can be found .

Sample designs
Geometric patterns:


Patterns of lines only:


Embroidery textiles

Waisted T-Shirts


Straight T-Shirts


Bags

