Let's Stitch - A Step By Step Tutorial
![]()
But what is Code'n'Stitch?
Embroidery Designer (only available for android devices) will let you program your own embroidery templates. No borders are set to your fantasy!
Check out the Embroidery Designer instagram page for more pics and videos.
Let's stitch!
01. Activate the embroidery extension.
(not necessary for Embroidery Designer App)
You now have new bricks:

02. Create a new, empty project.

03. Add a new embroidery object.
Embroidery objects represent a layer of the needle. That's how we control the embroidery machine.
04. Switch to the scripts of your object and build this script.
Hint: Use the color to find the bricks.
Start the program and check it out!
*If you want to see all of your stitches, use the "hide"-brick (look category).
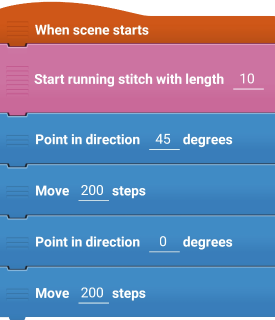
05. Expand your script:
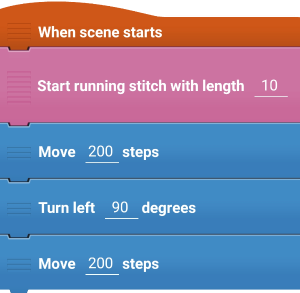
Start your program again.
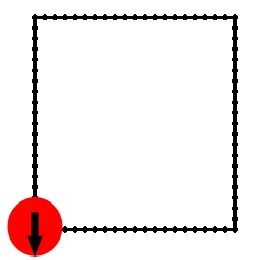
You now programed a corner. So to stitch lines you only have to activate the running stitch and move the needle.
06. Try to stitch a square by adapting your program on your own!
Are there many blue bricks in your script?
You can shorten your script by using a loop! Try it. You'll find a solution at the end of the page.
07. If you want to move your square, use the "place at"-brick (motion category).

Are you turning right? Absolutely! Or relatively?
We used the "turn left"-brick to control the needle. This brick navigates the needle from a first-person perspective
We call this a relative change of direction.
But you could also navigate the needle in an absolute fashion. Use this brick to do so:

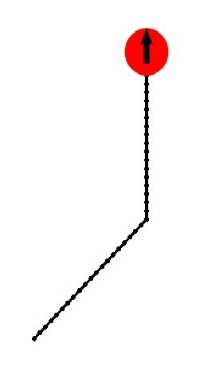
You can always use this crosshair to find out in which direction the needle will point. So in which will it do?
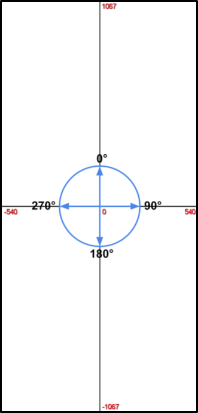
Did you guess it? It points downwards.
Task: Print this and cut it. You could also just draw it yourself. Put it next to your phone to always have the possibility to have a sneak at it.
Use the cross-hair to find out which line this script will produce:
You'll find the solution at the end of the page.
Colours, Layers & Objects
01. Add another embroidery object.
A series of embroidery objects results in a series of layers of your needle. This enables us to stitch in different colours because the embroidery will stop after each object, so you can switch threads.
02. Switch to the scripts of your new object and add these bricks:
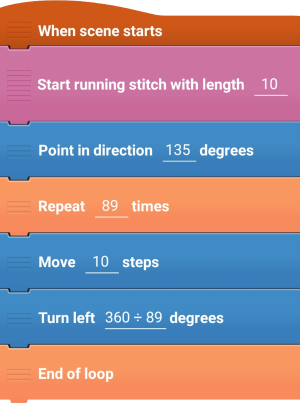
Start the program and see what happens:

03. If you want to stitch a smaller circle, alter the "89" in all bricks to a smaller number. To get a bigger circle, choose a bigger value.
Try it!
04. Looking at a full circle, "360" always remains the same. But, you could change it to "180" to get a semi-circle. Change the value and have a look!
To receive a quarter circle, change it to "90" and so on...
05. At the end, we stitch one more time to finish the circle.
Tutorials, Tips & Ideas
There are a lot more embroidery bricks to explore. Especially worth exploring is the "zigzag stitch". It lets you stitch thicker lines because the needle jumps back and forth. Test it yourself!
Here is an explanation of every embroidery brick.
You can find many embroidery patterns in our wiki. Here you'll find a heart, harry potter or a spiral pattern. Or just download them as .
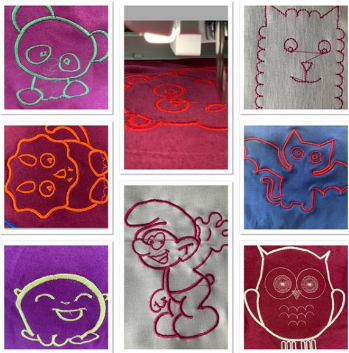
Designing my own super cool embroidery pattern
01. At first you'll need... an idea!
Just think of simple patterns and shapes, maybe logos or your name.
02. Fetch yourself graph paper or print this template:
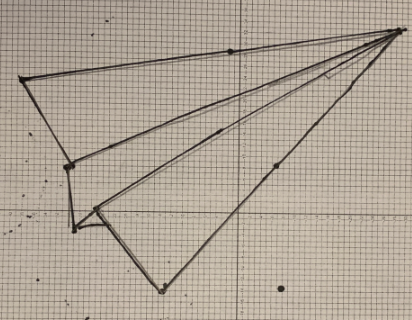
03. Transfer your idea to paper.
This will help to shape your idea and will make completion easier. Here's an example:
04. Implementation time! Split your pattern into several embroidery objects.
At first think of easier patterns to not be disappointed because it turns out more difficult than expected.
This is how the implantation basically works:
start a running or a zigzag stitch
move the needle
point in another direction (use your crosshair!)
and move again
05. Congratulations.
Congratulations on finishing this tutorial! Once you have completed this tutorial please go to https://code.org/api/hour/finish to get your certificate.
Make it durable: Sew up
Preview & Export
Here is how you can start the preview:
And here is how you can save or send your file:
Solutions
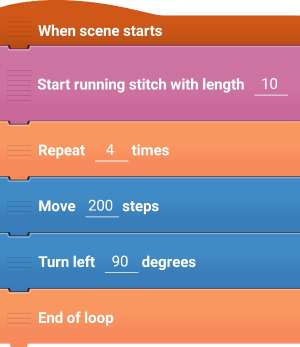
Here is the solution for the square using a loop:
Here is the solution for the direction of the line: